Arduinoboy Pro
About
Arduinoboy is software for the Arduino hardware platform that allows serial communication (MIDI) to the Nintendo Gameboy for music applications such as LittleSoundDJ, Nanoloop., and mGB
Current Features
- Affordable and easily accessible parts for assembly.
- Accurate MIDI Sync, Start and Stop commands.
- Push Button selector sets the sync/state modes (7 modes available)
- mGB Mode: Full MIDI in support across all Gameboy Channels, including a unique "poly" mode allows you to play your Game Boy like a synthesizer.
- Midi Out Doubles as a Midi Thru
- "Filtering" data for only sync messages, no dedicated MIDI line required.
- Can be powered by the Game Boy's gamelink port.
- USB upgradeable via Arduino.
- Midi settings configurable using a Mac/PC editor built in Max.
- Tested and works with DMG (Original), Gameboy Color, and Advance/SP.
Modes Details
Mode 1 - LSDJ as MIDI Slave Sync
Slave your Game Boy running LittleSoundDJ to your midi sequencer or Digital audio workstation.
You can send the arduinoboy midi notes to change sync resolution and start/stop the LSDJ sequencer.
LSDJ Slave Mode Midi Note Effects:
- 48 -
C-2Sends a Sequencer Start Command - 49 -
C#2Sends a Sequencer Stop Command - 50 -
D-2Toggles Normal Tempo - 51 -
D#2Toggles 1/2 Tempo - 52 -
E-2Toggles 1/4 Tempo - 53 -
F-2Toggles 1/8 Tempo
Higher note values than these map LSDJ song position row offset on a Song Start.
In LSDJ the sync mode should be set to Slave
Mode 2 LSDJ as MIDI Master Sync.
Send Midi sync with LSDJ as a midi clock master, LSDJ also sends a Midi Note on message that corresponds to the song row number on play.
In LSDJ the sync mode should be set to Master
Mode 3 LSDJ PC Keyboard mode.
This mode emulates the PC Keyboard Mode built into LSDJ, allowing you to control the following aspects of LSDJ:
Features:
- The first octave controls M-U-T-E,
- Cursor control (LSDJ Live mode only),
- Table selection
- Table cue.
PC Keyboard mode midi note map
- 36 -
C-1Mute Pu1 Off/On - 37 -
C#1Mute Pu2 Off/On - 38 -
D-1Mute Wav Off/On - 39 -
D#1Mute Noi Off/On - 40 -
E-1Livemode Cue Sequence - 41 -
F-1Livemode Cursor Up - 42 -
F#1Livemode Cursor Down - 43 -
G-1Livemode Cursor Left - 44 -
G#1Live mode Cursor Right - 45 -
A-1Table Up - 46 -
A#1Table Down - 47 -
B-1Cue Table - 48+ - Notes from this note up will accept midi in from an external keyboard or sequencer and allow you to play the notes
C-2 to C-8. - Midi Program Change messages will select from instrument table
- Default Midi channel is 16. You can set this in the top of the main source file in the archive, or via the Max Pat editor.
In LSDJ the sync mode should be set to Keyboard
Mode 4 MIDI to Nanoloop sync
Sync Nanoloop. to external midi clock signals sent to the midi in.
In Nanoloop, the sync mode should be set to slave.
Mode 5 Full MIDI with mGB
mGB is a Gameboy cartridge program (You need a Flash Cart and Transfer hardware) That enables the Gameboy to act as a MIDI supported sound module that allows full control of the Game Boy sound hardware.
It works with the old DMG Gameboy as well as GBC/GBA.
Mode 6 LSDJ MIDIMAP
Lsdj will sync to incoming MIDI sync, and incoming MIDI notes are mapped to LSDJ's song row #. The currently selected row's MIDI note is displayed on the top right of the LSDJ screen, and incoming MIDI notes will also display the relative song row number in the same location.
In LSDJ the sync mode should be set to MI.MAP.
This requires a special version of LSDJ, which can be found in your account on the LSDJ website.
Mode 7 LSDJ MIDIOUT
Each of the 4 gameboy channels send MIDI data on 4 midi channels by the use of effects commands:
Nxx- Sends a MIDI Note - Absolute to the value placed in the effect. N00 sends note off,N01-N6Fsend midi notes 1 to 112.Qxx- Sends a MIDI Note relative to the current channel's pitch. The effect value is a offset. soQ0CinPU1would send a note 1 octave higher than whatPU1is currently playing. This is useful as a table command to track midi notes as normal notes in the sequencer.Xxx- Sends a MIDI CC - By default in Arduinoboy the high nibble selects a CC#, and the low nibble sends a value0-Fto0-127. This can be changed to allow just 1 midi CC with a range of00-6F, or 7 CCs with scaled or unscaled values.Yxx- Sends a program/patch/preset change.
By default each channel of LSDJ is mapped to midi channels 1-4. For example note commands from PU1 will be sent to midi channel 1.
In LSDJ the sync mode should be set to Midiout.
This requires a special version of LSDJ, which can be found in your account on the LSDJ website.
Max Editor
 The Arduinoboy Editor for Max for PC/OSX machines is a gui editor that allows you to edit the various global midi settings of your arduinoboy without editing or flashing code, over midi. It used to required the now deprecated Max Runtime, but you can also run it using a demo of Cycling '74's Max application
Maxpat Settings
Midi In/OutConnect your arduinoboy to these ports on your system. Once it has connected, all the lights on your arduinoboy should flash in order, and the editor will show a greenConnected.ModeSetting this will tell your arduinoboy what mode to boot into automatically. This is handy if you built your own arduinoboy and decided you wanted to skimp out on LEDs and a button.LSDJ Slave Mode settings- The midi channel LSDJ slave mode will receive its commands on.LSDJ Master Mode settings- The midi channel LSDJ Master mode will send its midi notes mapped to row number on.Keyboard Mode settings- What channel LSDJ will look for its keyboard mode midi commands. No idea what compatibility mode does.mGB midi settings- Map each incoming midi channel to a specific Gameboy channel in mGB.LSDJ Livesync/Livemap settings- The midi channel Livesync/Livemap will listen to incoming midi commands from.LSDJ Midiout settings- Here you can set the following:Note midi channel- The channel each LSDJ channel will send it's midi note commands on.CC midi channel- The channel each LSDJ channel will send it's Continuous Controller commands on.CC 0- The initial CC each channel will send. The type of data it will send is based on the next setting.CC Mode- Game Boys have limitations! You can either have arduinoboy send one CC with many values, or 7 with limited 8bit values. By default in Arduinoboy the high nibble selects a CC#, and the low nibble sends a value [0-F] to [0-127]. This can be changed to allow just 1 midi CC with a range of 00-6F, or 7 CCs with scaled or unscaled values.CC Scaling- Set wether the 7 CCs are scaled or unscaled.
Description
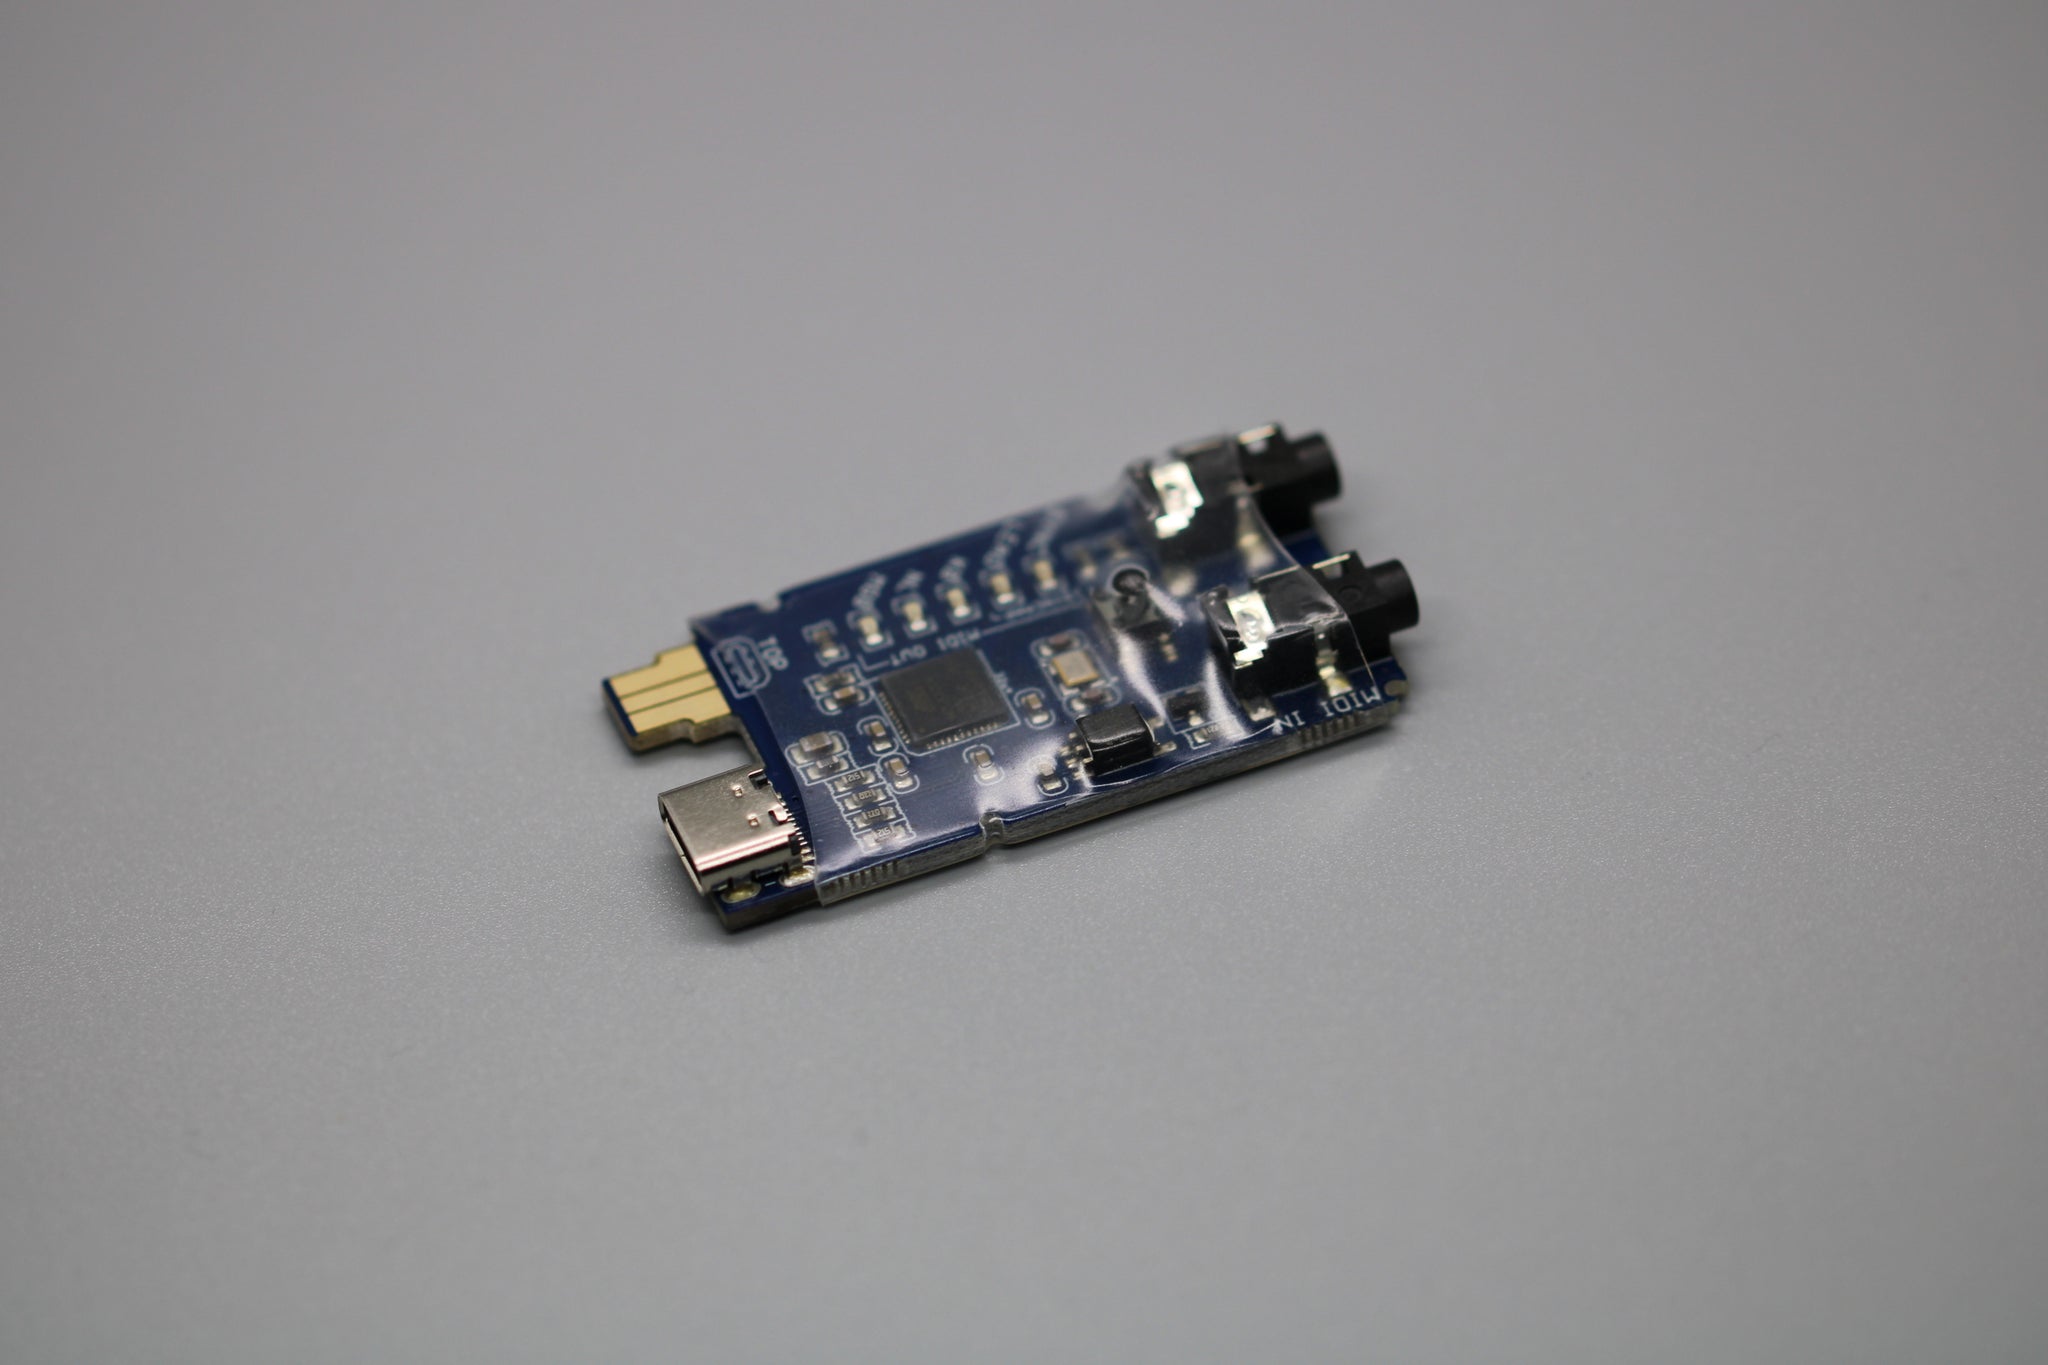
The next generation of Arduinoboy is finally here! The Arduinoboy Pro is the successor to the Teensyboy Pro. It's smaller, has a USB-C port for USB MIDI, 3.5mm TRS (Type A) jacks for MIDI In/Out (TRS to DIN MIDI adapter is included), uses a more versatile PCB edge link port for compatibility with DMG and GBC style link cables, and is wrapped in clear heat shrink for additional durability. This really is the best Arduinoboy I've ever offered!
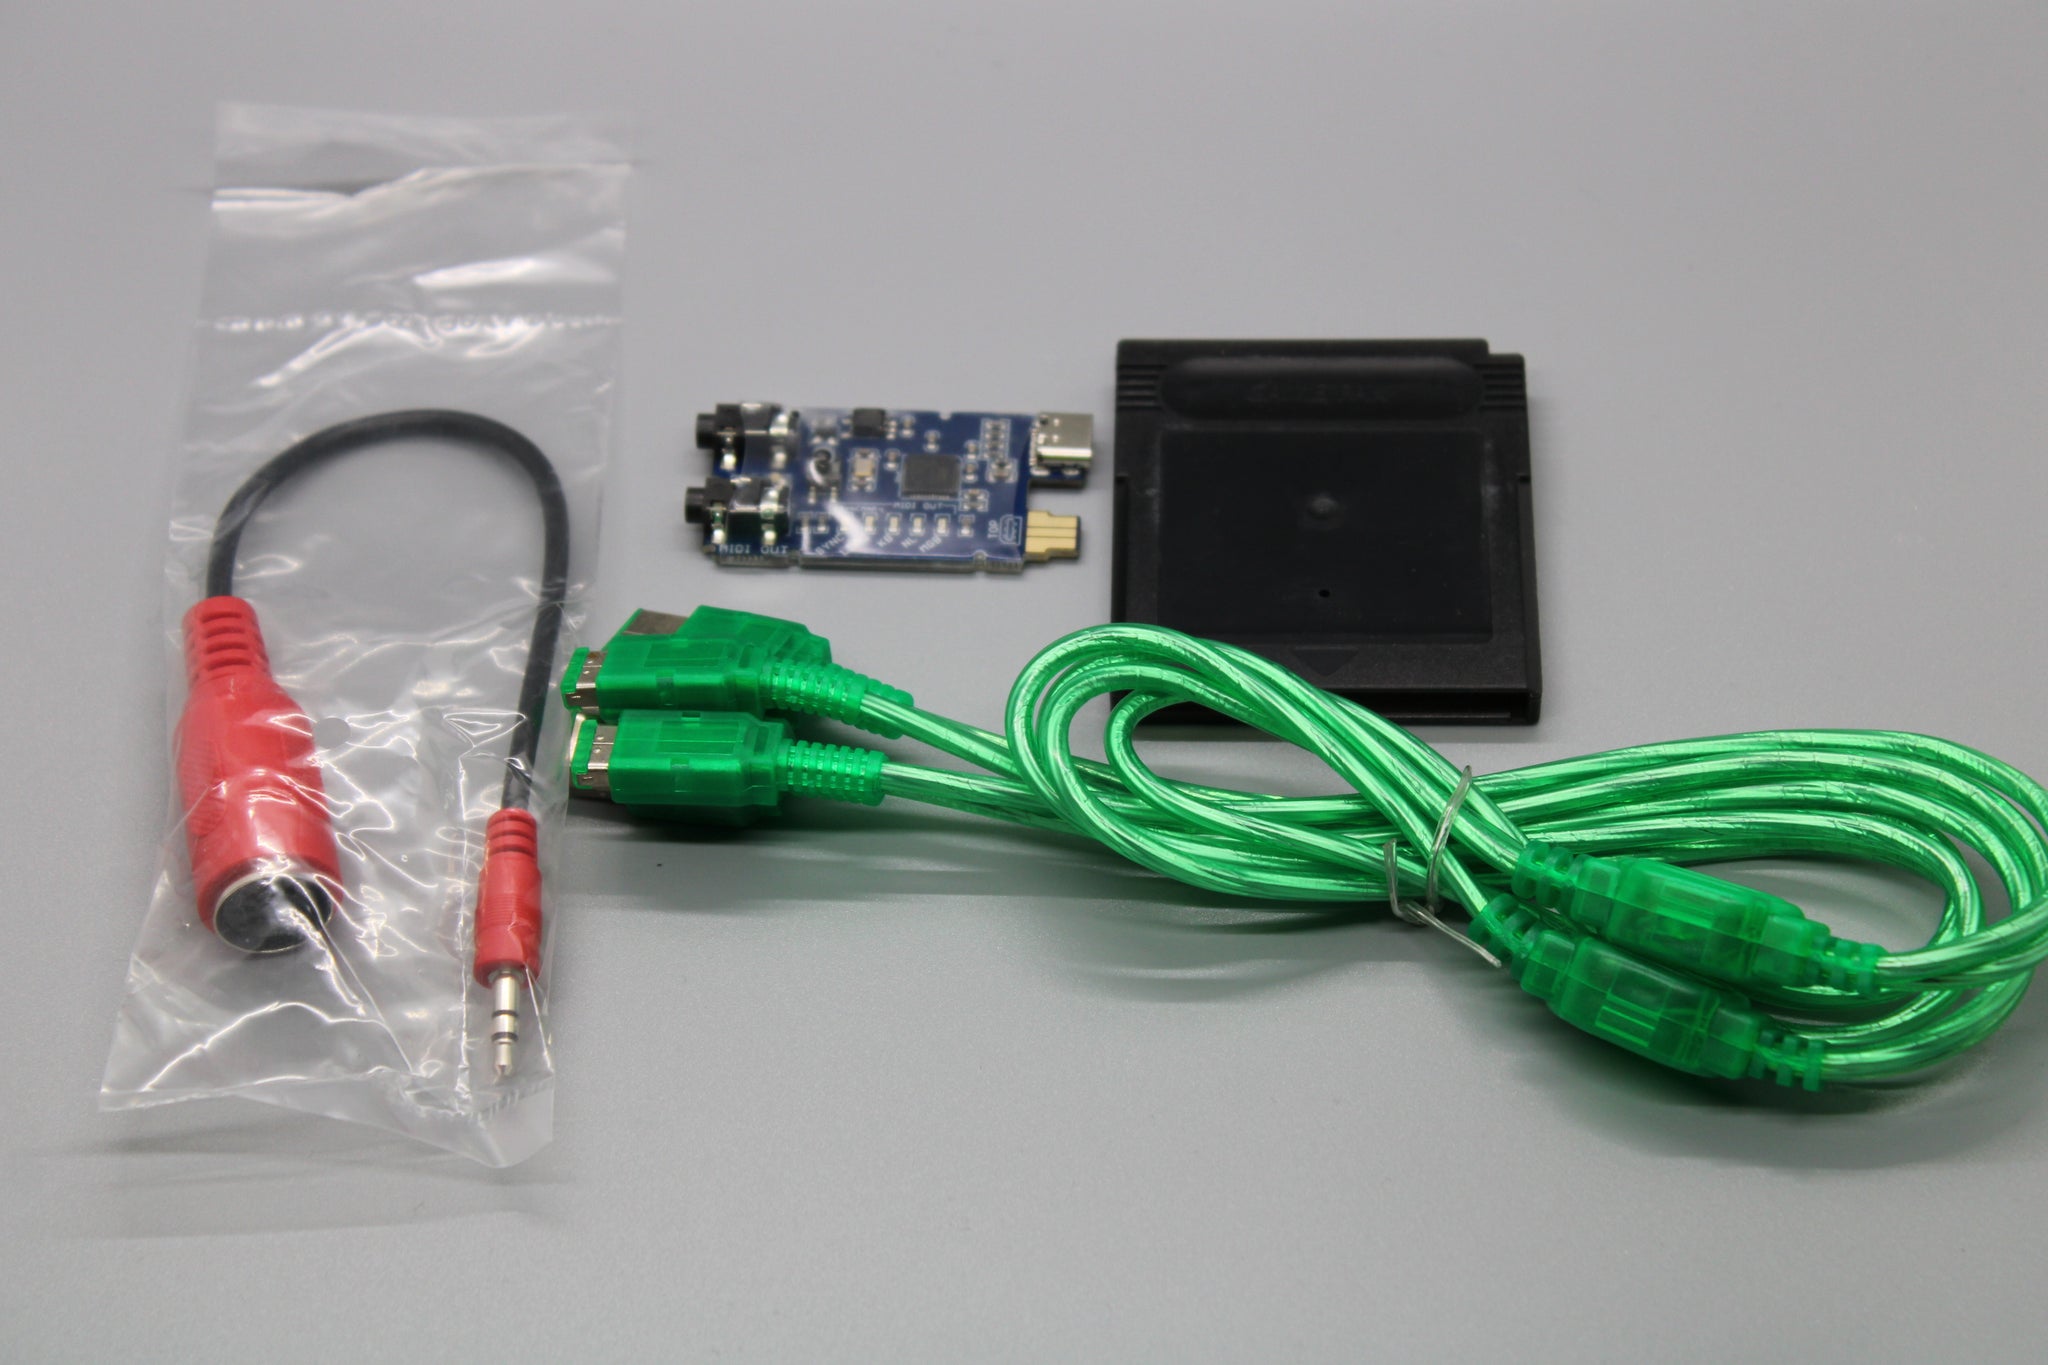
The Quickstart bundle includes a cartridge with mGB and a dual link cable for a Gameboy DMG/Pocket/Color/Advance. It contains everything you need to rock out with your Gameboy!
Credits to trash80 for design and coding. We <3 him.
What's Included - Quickstart Bundle
- 1 x Arduinoboy Pro
- 1 x MIDI-TRS Adapter
- 1 x 32 kB Cartridge flashed with mGB
- 1 x Dual link cable
Arduinoboy Pro Quickstart Guide
Before testing the TRS-MIDI connection, we recommend testing MIDI first over USB.
-
Connect the Arduinoboy Pro via USB-C to your computer. Note that USB-C is responsible for data and power, so double check that your cable carries both signals.
-
Confirm that the LED next to mGB is lit up. This button switches between MIDI modes (i.e. LSDJ, mGB, etc). Sometimes when cycling through settings it may get stuck, remedy this by power-cycling (i.e. removing and inserting the USB-C cable) while holding the mode switch button.
-
Open up your MIDI capable software of choice and look for MIDI devices. The device should be recognized as Arduinoboy Pro.
-
Try sending a few notes. Even without the Gameboy connected, LED's on the Arduinoboy board should blink with each note.
-
Power on your GB with the mGB cartridge inserted.
-
Connect the green link cable from your GB to the Arduinoboy. Double check the orientation and jiggle if needed (the cables are unfortunately a little finicky).
-
Try sending a few notes again. MIDI channel 1 should produce a few characteristic Gameboy sounds on PU1 (pulse channel 1). Success!
This should help with the initial setup. Feel free to reach out to support@catskullelectronics.com for any questions and help troubleshooting!
Purchased on Catskull Electronics for $86.39 USD on 2023-01-06, order #3775.